Translations: "Italiano" |
Getting started with Meraki API
Introduction
Cisco Meraki dashboard is very useful because you can easily configure and monitor devices that are located everywhere and connected to Internet (specifically at Meraki cloud), only accessing a web portal.
However, not having a CLI for the device configuration brings, in some cases, a bigger time spent to configure devices, especially if we have to do a bulk configuration.
Last time, in my case, I had to configure Meraki switches with ACLs for different branches (i.e. networks). Even cloning a new network from a previously created one, I cannot have a copy of the switch ACL section. So, for every network, I have to manually configure every line of ACLs with drop down menus and fields to fill in. Every network has similar ACLs (i.e. an ACL used to block internal traffic in a guest VLAN), so finding an automation method for ACL configuration can save me lot of time and boring stuff.
Fortunately, I discovered that Meraki supports API and through them it is possible to configure switch ACL.
So let's get started with Meraki API.
Getting started
Here you can find a useful link in order to getting started with Meraki API.
If you are not familiar with API, Postman could be a good starting point. Postman is a popular graphical tool for working with REST APIs. If you have not installed yet, you can download the software here. It is not mandatory to create an account but it can help sync your environments across machines.
After having installed Postman, let's start with the setup of Meraki dashboard and Postman.
Let's start with Meraki dashboard.
Enable API access
At this link you can find how to enable API access on Meraki.
For access to the API, first enable the API for your organization under Organization > Settings > Dashboard API access.

After enabling the API, go to the my profile page to generate an API key. This API key will be associated with the Dashboard Administrator account which generates it, and will inherit the same permissions as that account. You can generate, revoke, and regenerate your API key on your profile.
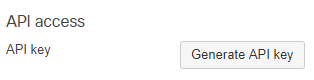
Copy your key where you want, because you will use it on Postman.
At this point, we are ready to setup Postman.
Postman setup
In my case I used Meraki API v0.
First of all open Postman on your PC and then go to the Meraki Postman collection link accessible here. Here you will find all possible Meraki API and explanation. Our purpose is to import the REST APIs as a new collection on Postman. In order to do that you have to click on the Run in postman button located on the upper-right of the Postman collection link and then on Postman for Windows (in my case, using Windows 10)
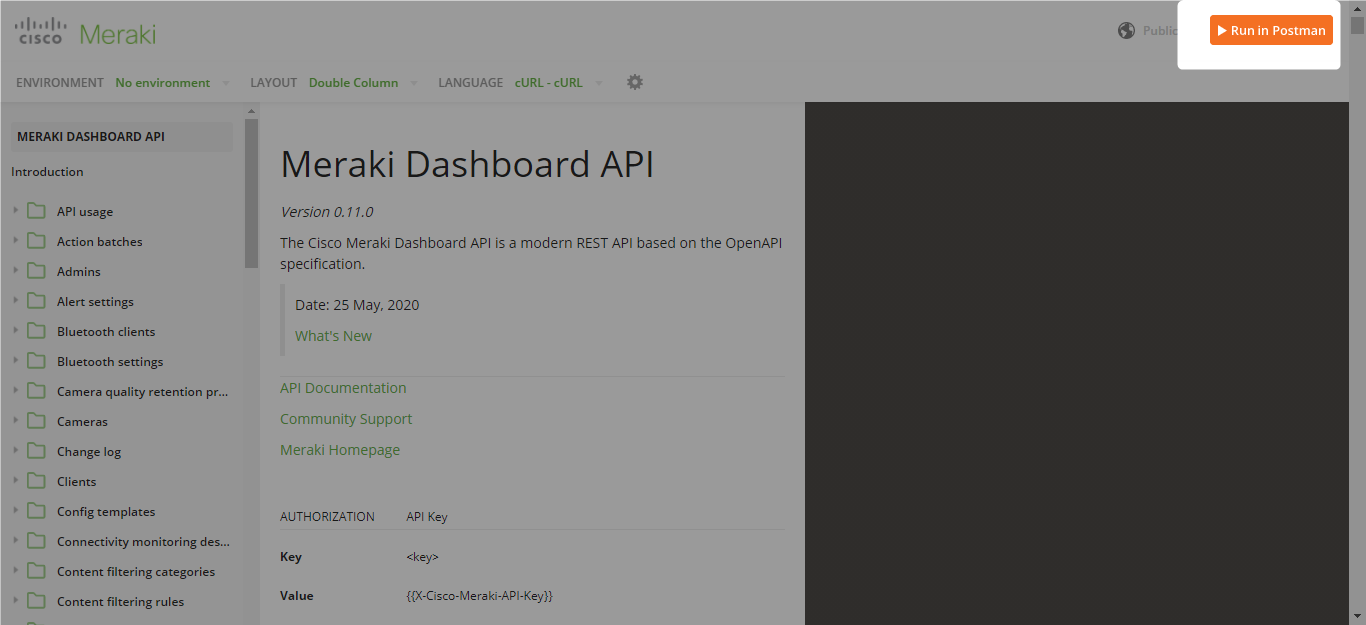
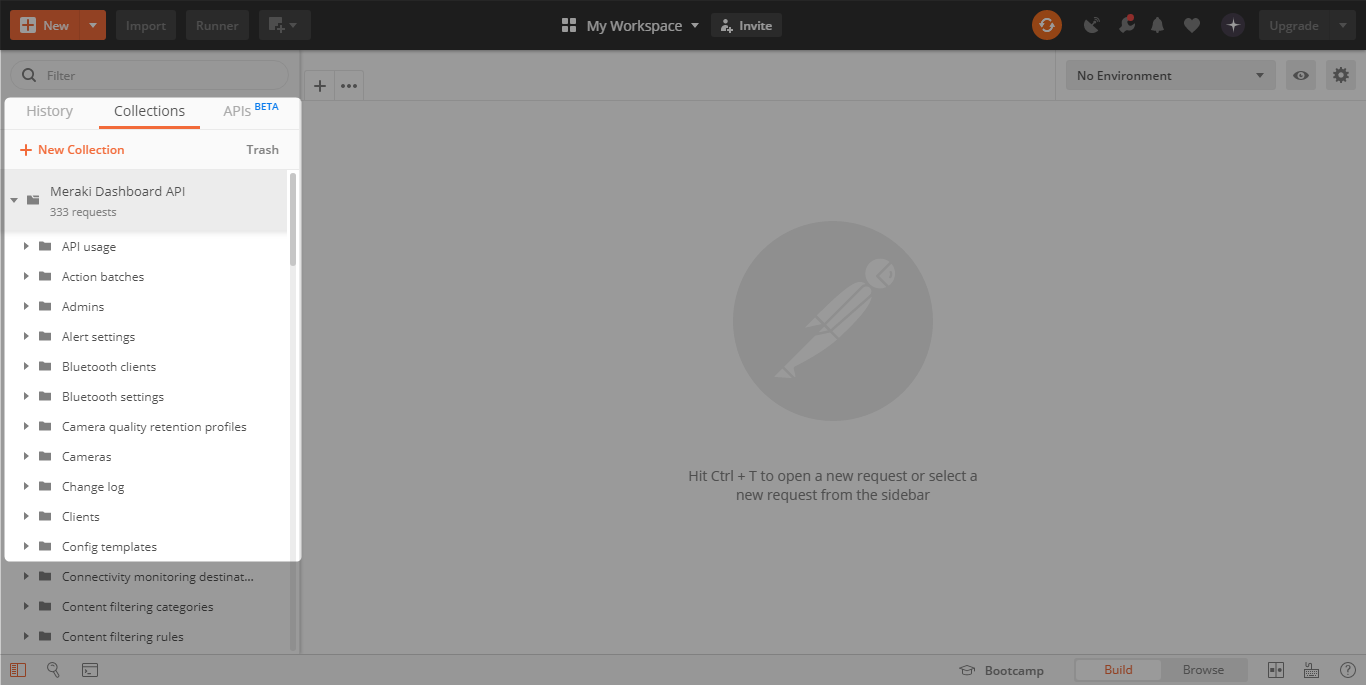
After that, you will have all Meraki APIs imported on Postman.
Now we can start setting Postman environment. An environment is a set of stored variables that can be "loaded" in order to send useful APIs. To set and save a new environment click on the eye on the upper-right section and then Add.
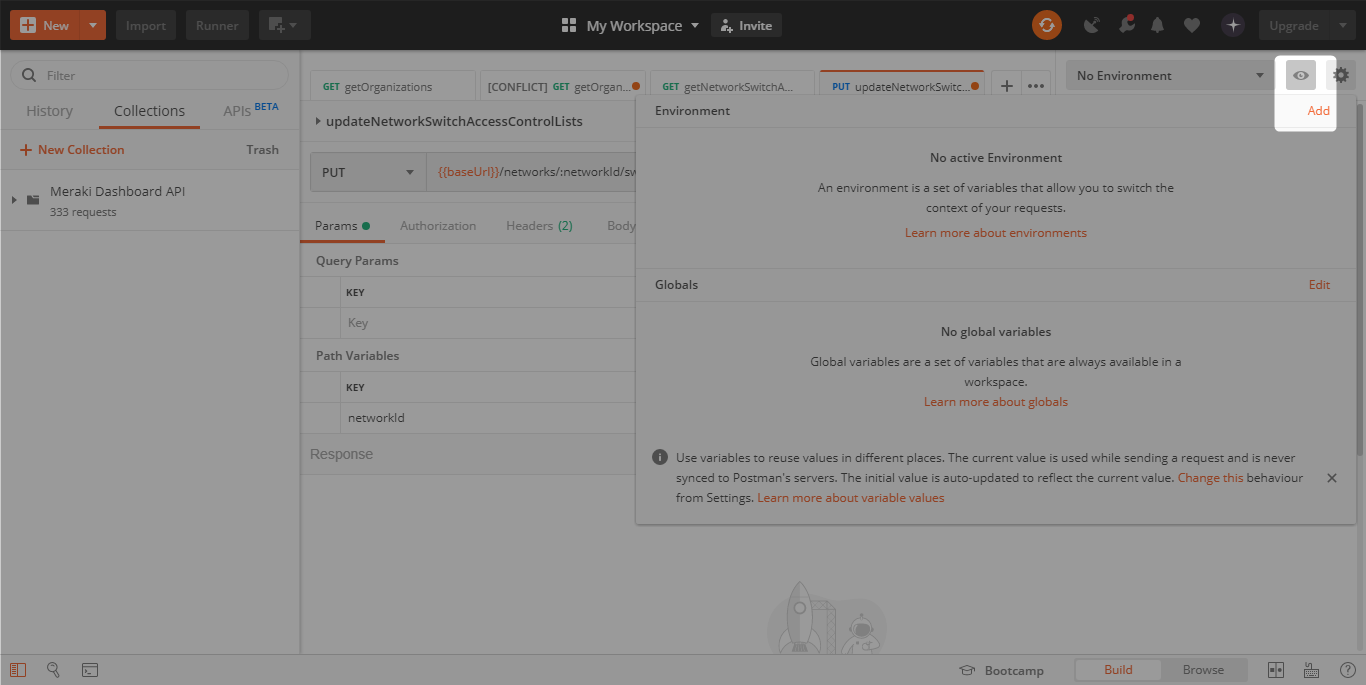
First of all we choose an environment name, for example "Meraki API TestOrg".
Then we set variables. The first variable to set is the baseUrl, i.e. the Url of the rest API. We insert baseUrl under variable column and https://api.meraki.com/api/v0 under initial value and current value.
Then we have to insert the previously generated Meraki API key, in order to authenticate ourselves. Under variable we write X-Cisco-Meraki-API-Key and as initial value and current value we put our key.
In the image below, you can see the key available from Meraki for testing API calls.

When finished to set variable we click on Add button and then in the upper-right we choose the new created environment.
API calls
Now we are ready to send our first REST API call. From the Meraki dashboard API collection we go under Organization folder and we select getOrganizations. Then we click on Send and we wait for reply.

From the reply, you have the organization ID for every organization that you manage (and where dahsboard API is active). Now you can insert the ID of the organization that you need to configure (or monitor) as an environment variable. As variable we insert organizationId and then the value obtained from the call.
Then you have to find the ID of the network you need. To do this you have to select the call getOrganizationNetworks under Network folder. Be sure to unselect the optional parameter configTemplateID.

Now, as for Organization ID, we insert the network ID as environment variable. Under variable we set networkId and then the value obtained from the call.
We are now ready to obtain information from our network through GET calls and configure through PUT calls.
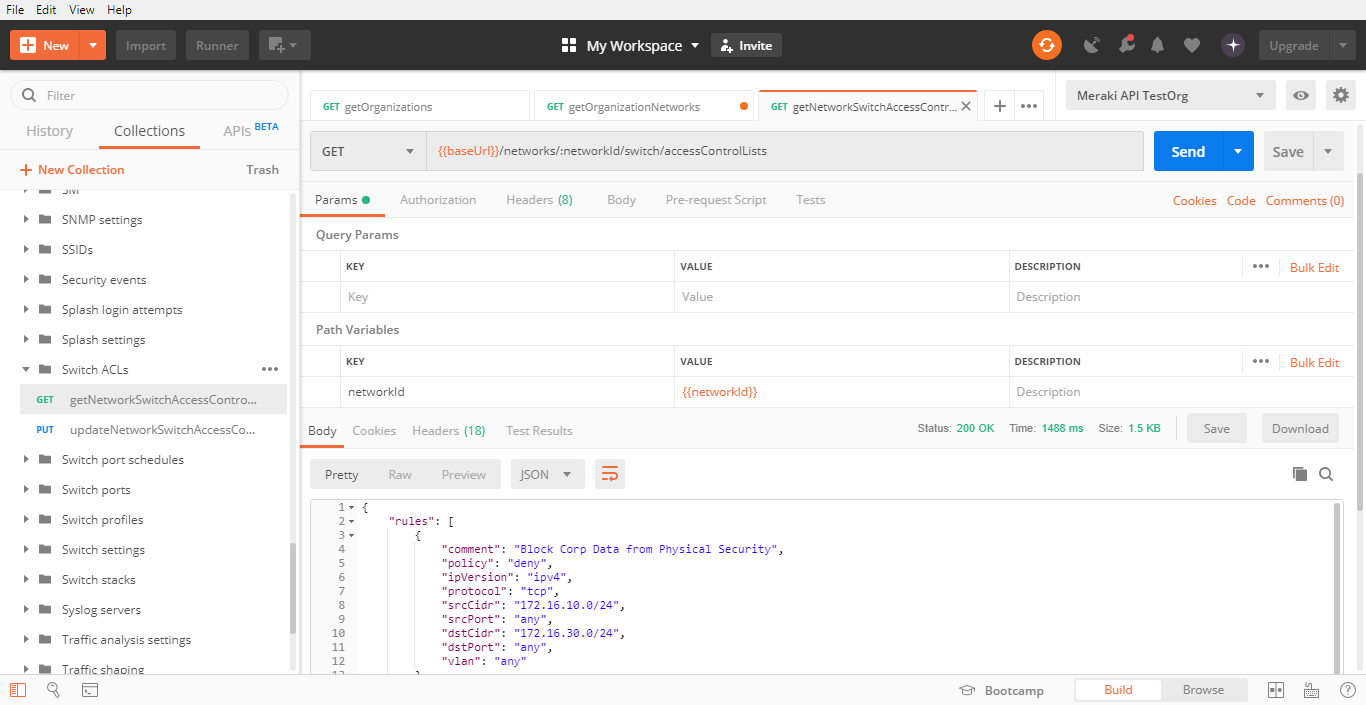
In my case, for example, I have to configure Switch ACL. In order to understand how to write the PUT call, you can read API reference documentation on Postman or, as I did, you can configure few lines of ACL through Meraki dashboard. Then you send getNetworkSwitchAccessControlLists call under Switch ACLs folder, you copy and paste the reply on Notepad++ (or equivalent).
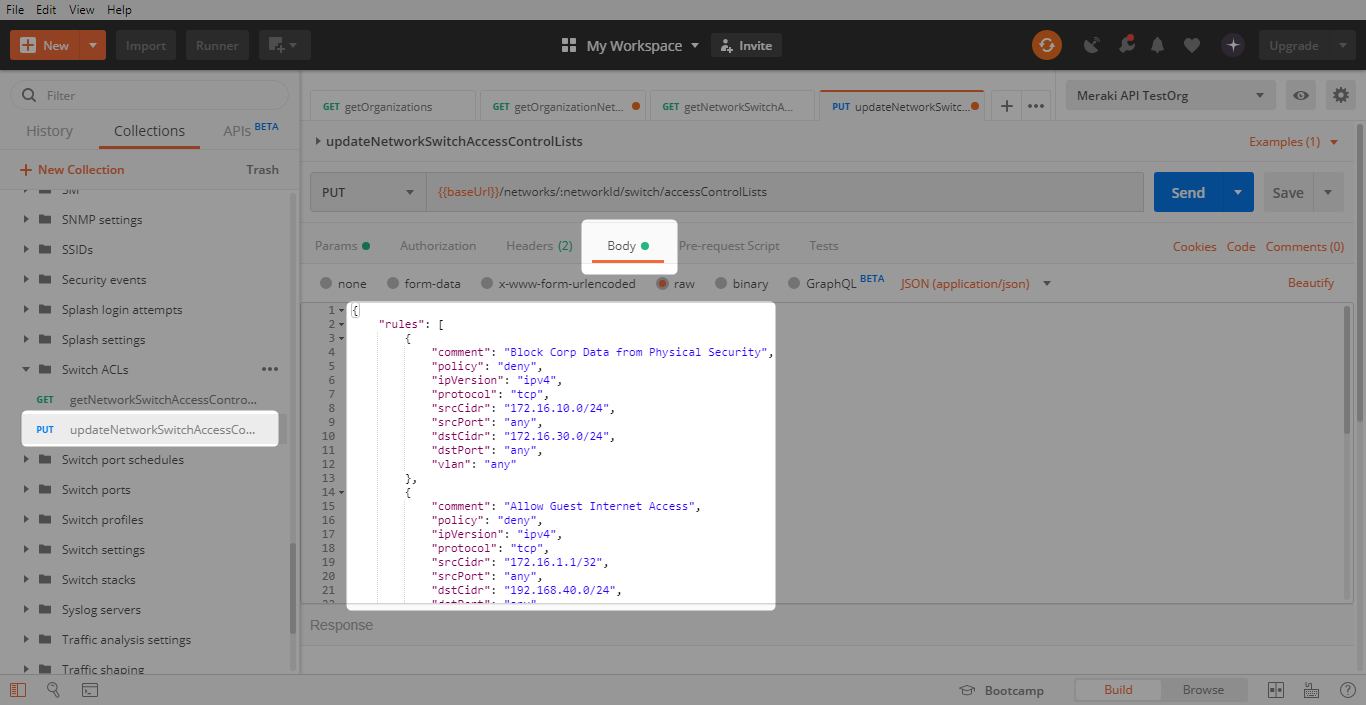
Then you modify the reply as your needs, you select the updateNetworkSwitchAccessControlLists call and under Body section you paste your ACL in JSON format.
Finally we are ready to see our Switch ACL, sent through API calls, on Meraki Dashboard.